Brunskill and Grimes puppet-making workshop

Many puppeteers are also puppet-makers, or at least have some skill in making. The more I work with puppets, the more interested I am in how they are put together, what materials they are made from and what considerations have gone into the design.

Hot on the heels of the devising with puppets workshop before Christmas came the chance to learn some puppet-making skills with the same company, Brunskill and Grimes. At the start of February a group of makers, designers, performers, directors, stage managers and various other assorted creatives gathered at the Workshop in Lambeth for the second of three two-day puppet-making workshops run by Jimmy Grimes and Andy Brunskill. The first took place just several days earlier and the third is happening mid-March, so if you happen to have booked on that workshop and don’t want any spoilers, stop reading here!

I cannot express how much I enjoyed the two days. I love my fellow performers but getting to meet so many people from other roles in the world of theatre was pure soul food. Everyone was so open and generous and interested to learn about each other’s work.

Having a play with Jackie the baboon

When we received the equipment list for the workshop I headed out to B&Q and went up and down the aisles clutching my list, excitedly placing my first ever proper saw (ie not a plastic kid’s one) in the basket. I have my own saw! Check me out! Granted, it is a junior hacksaw so I’m not going to be attacking any logs anytime soon. Add to that my first spanners and scalpel handle (I made a trip to Hobbycraft for that) and of course I needed a toolbox! So I rocked up at the workshop swinging my own little B&Q toolbox by my side, feeling convinced I looked every bit the professional handywoman. All the gear, no idea may have been more fitting.

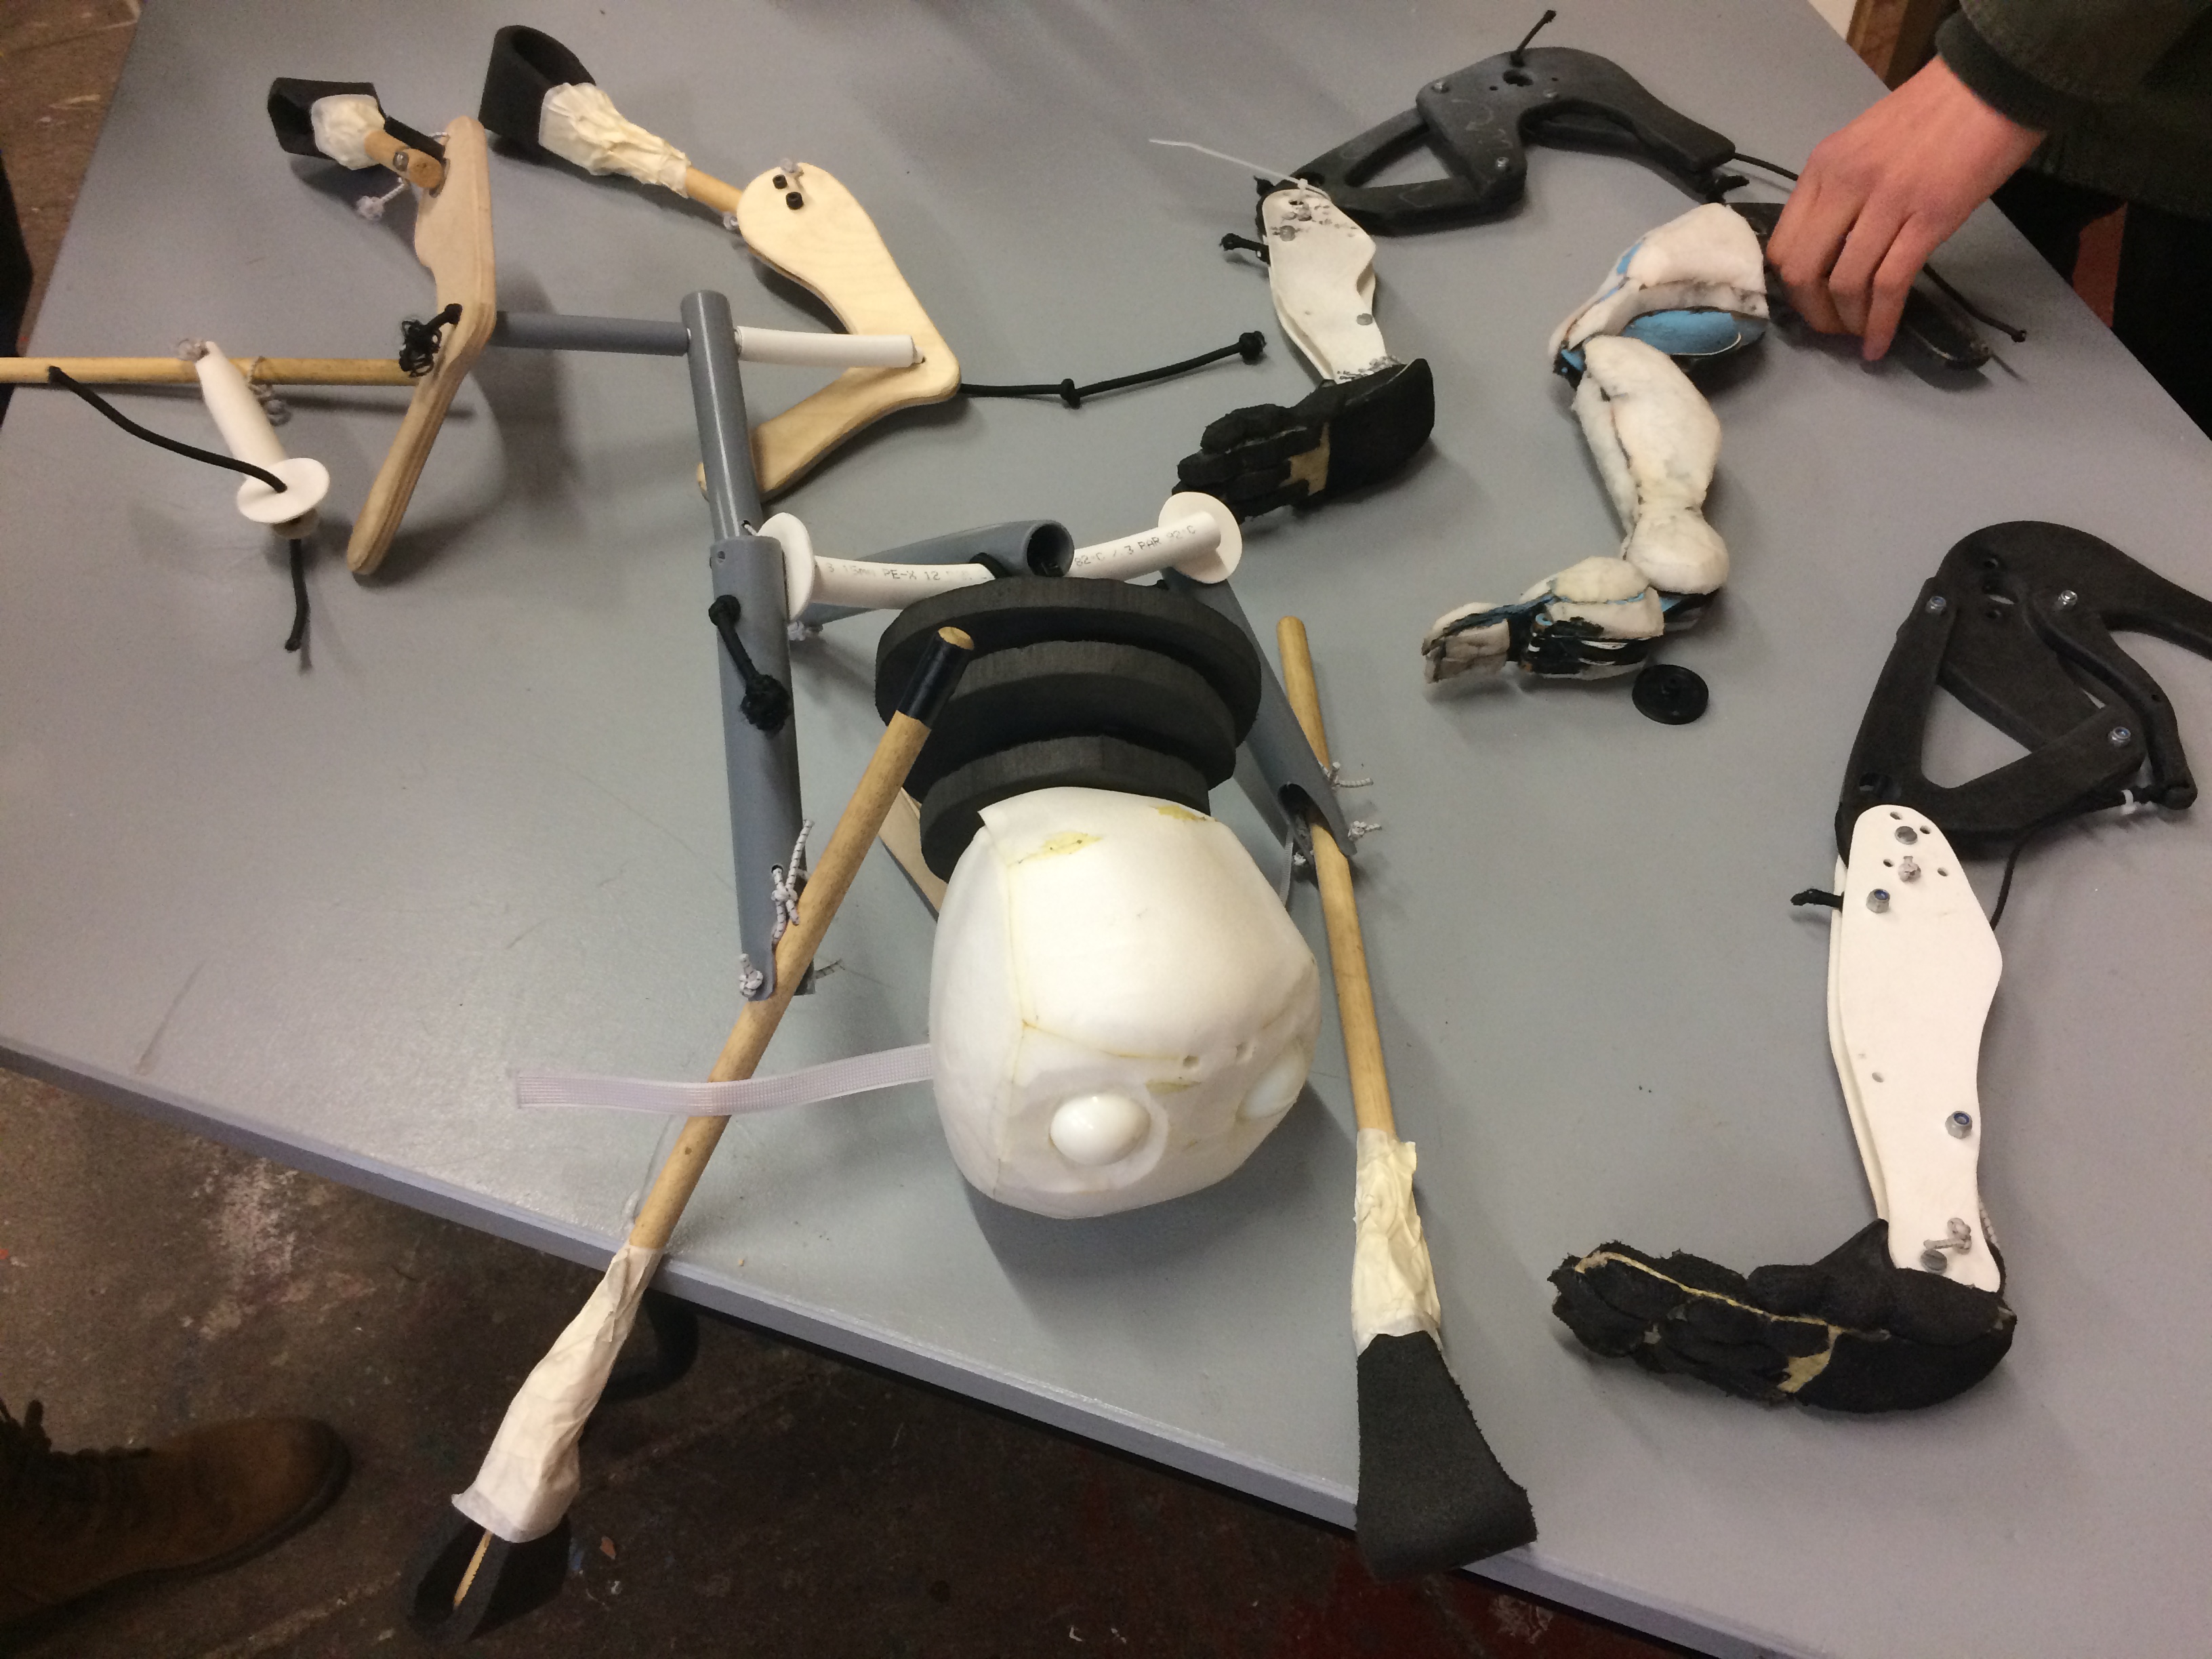
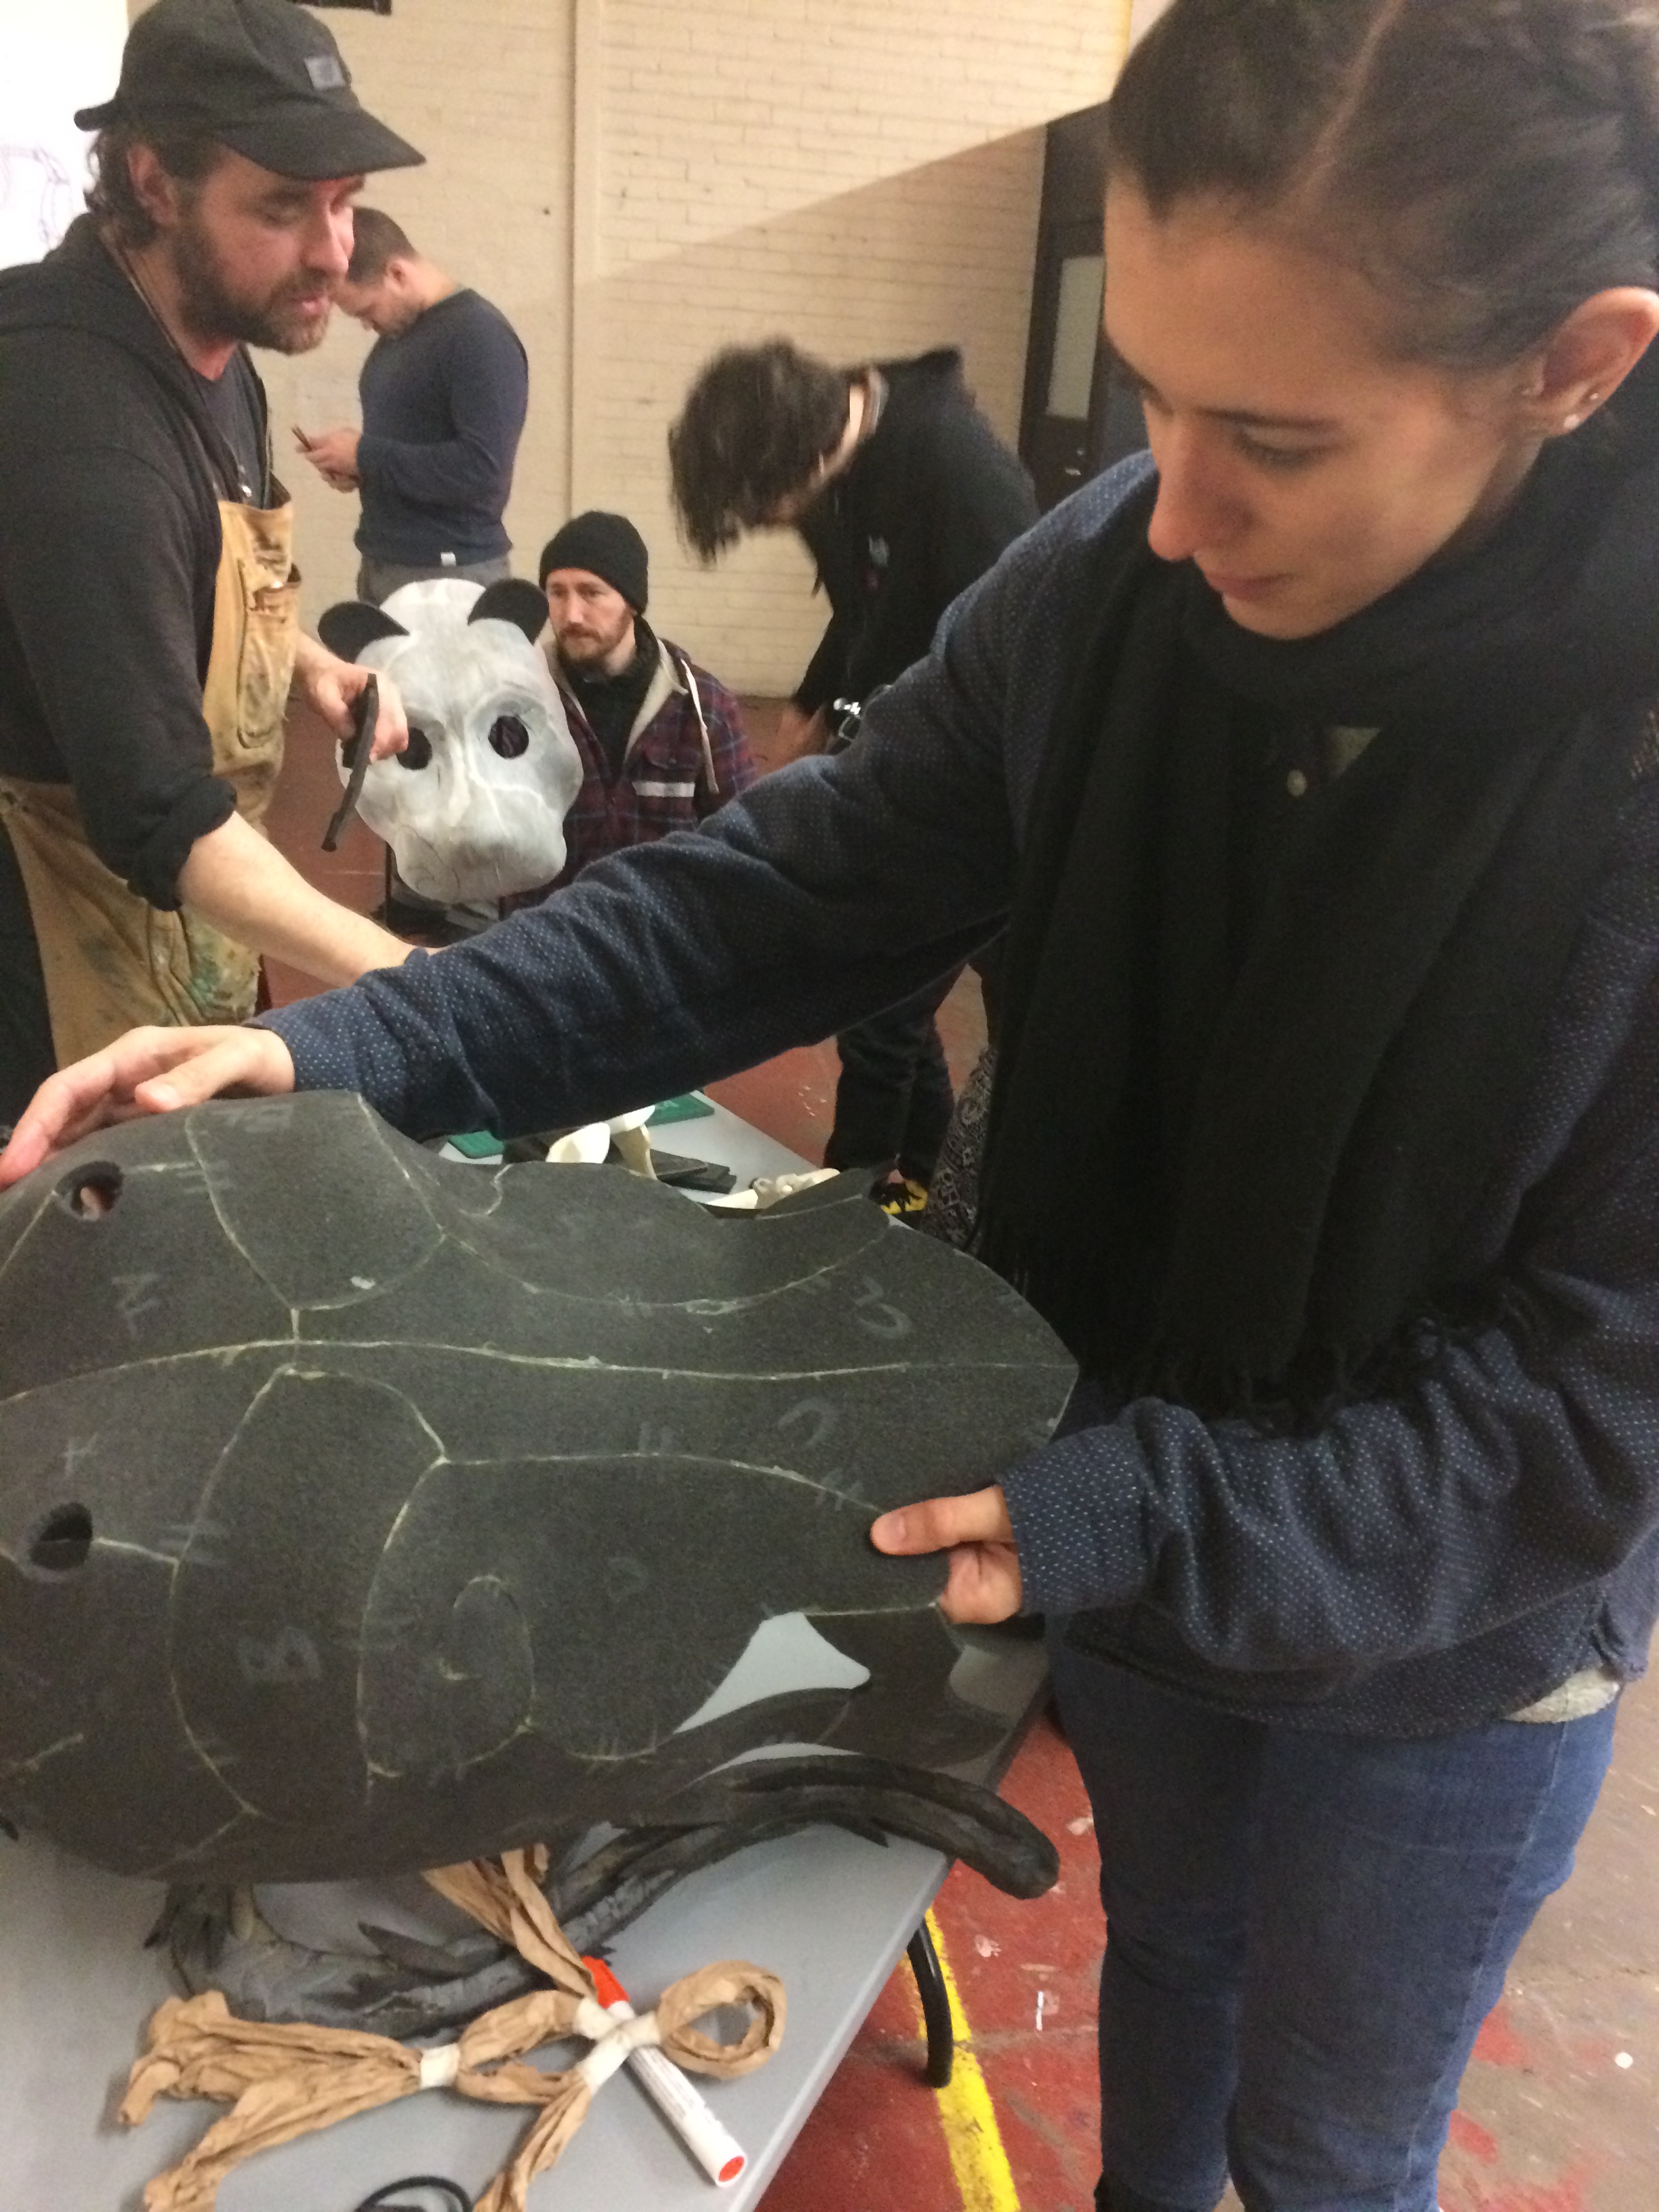
During the workshop we had the opportunity to examine various puppets and puppetry mechanisms that Jimmy has created for this show or that. He explained the pattern-making technique using a sculpt and plastazote, a kind of foam that most puppet-makers I know rave about, and we had the chance to have a brief play with the material.

Bertie Harris, yours truly and Jimmy Grimes demonstrating front and back leg movement on a four-legged puppet. I was cold, hence the hat.

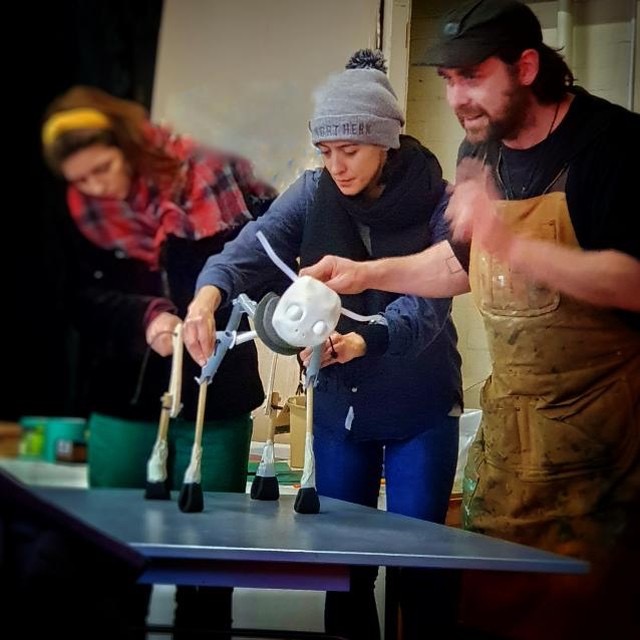
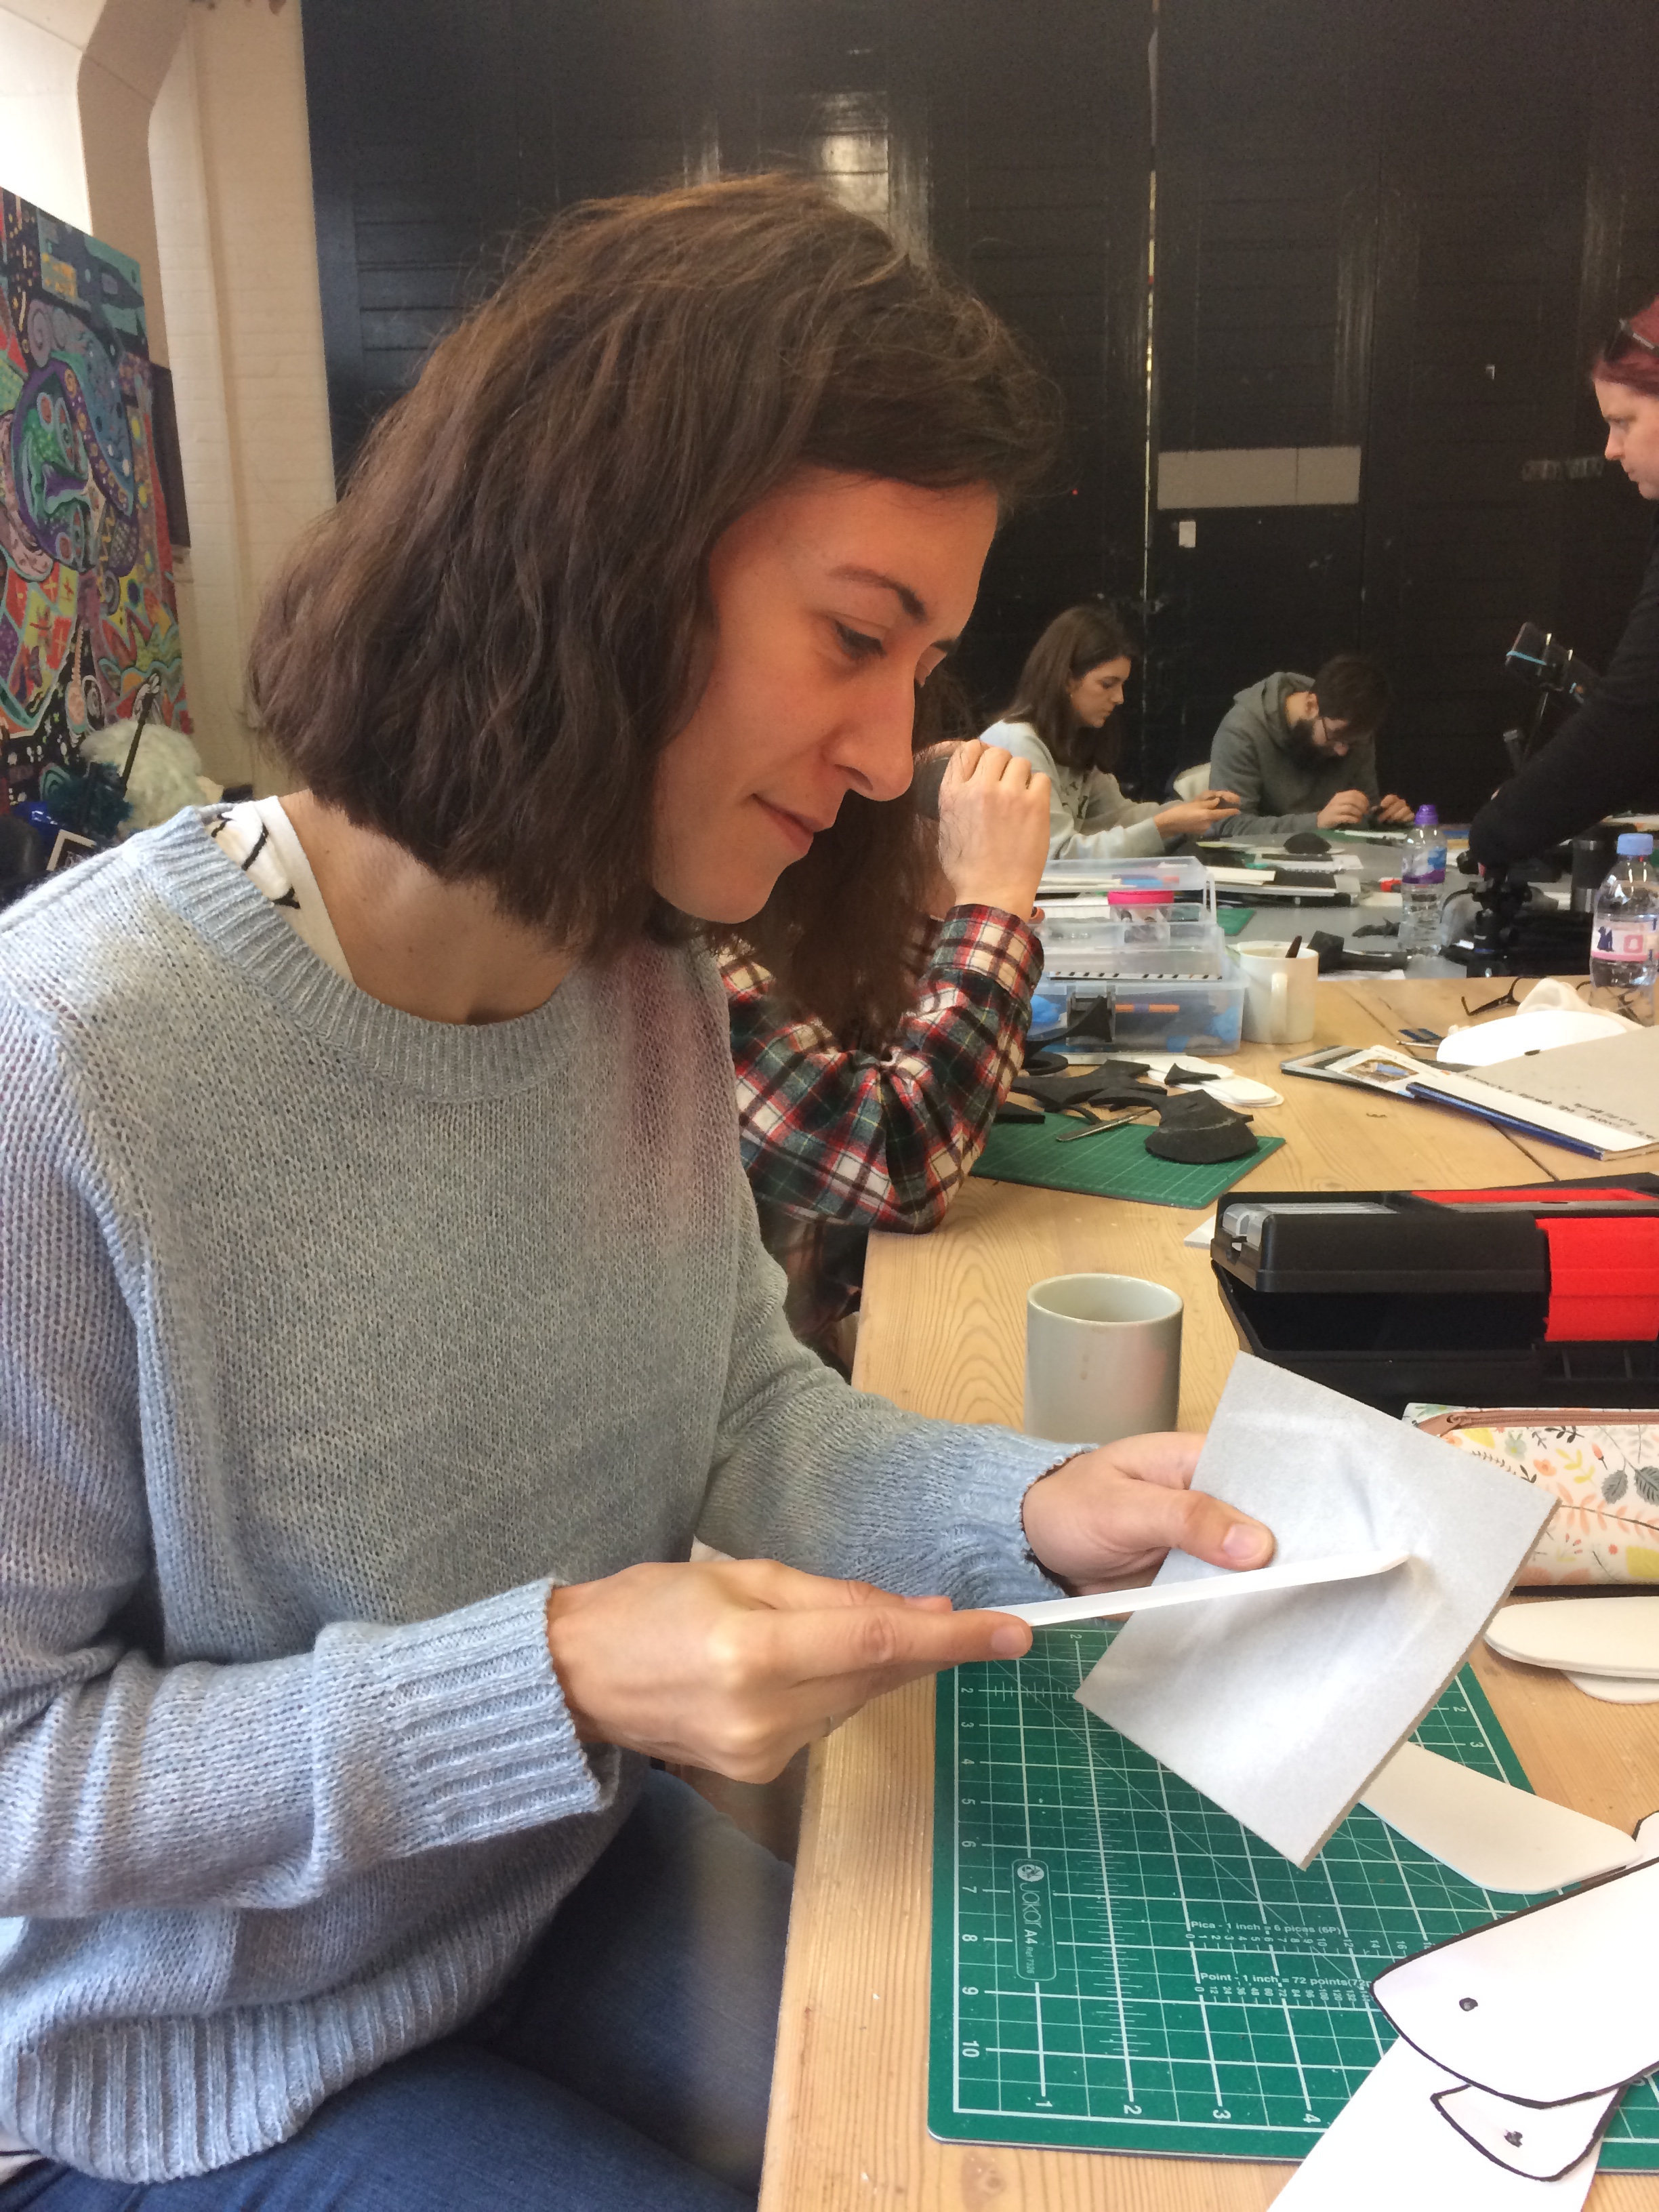
The two days built towards creating a jointed dog’s front leg with a trigger mechanism for the knee. I got to use my new scalpel handle and blades to cut out the various parts of the leg from a thin plastic called styrene, and the little spanners and hex keys came in handy for tightening the bolts on the joints. My thanks to the generous and patient fellow workshop attendees sitting next to me who helped me out here and there, from showing me how to fit the scalpel blade into the handle, to how to use the spanner to hold the bolt still on one side while turning the hex key on the other side to tighten it.

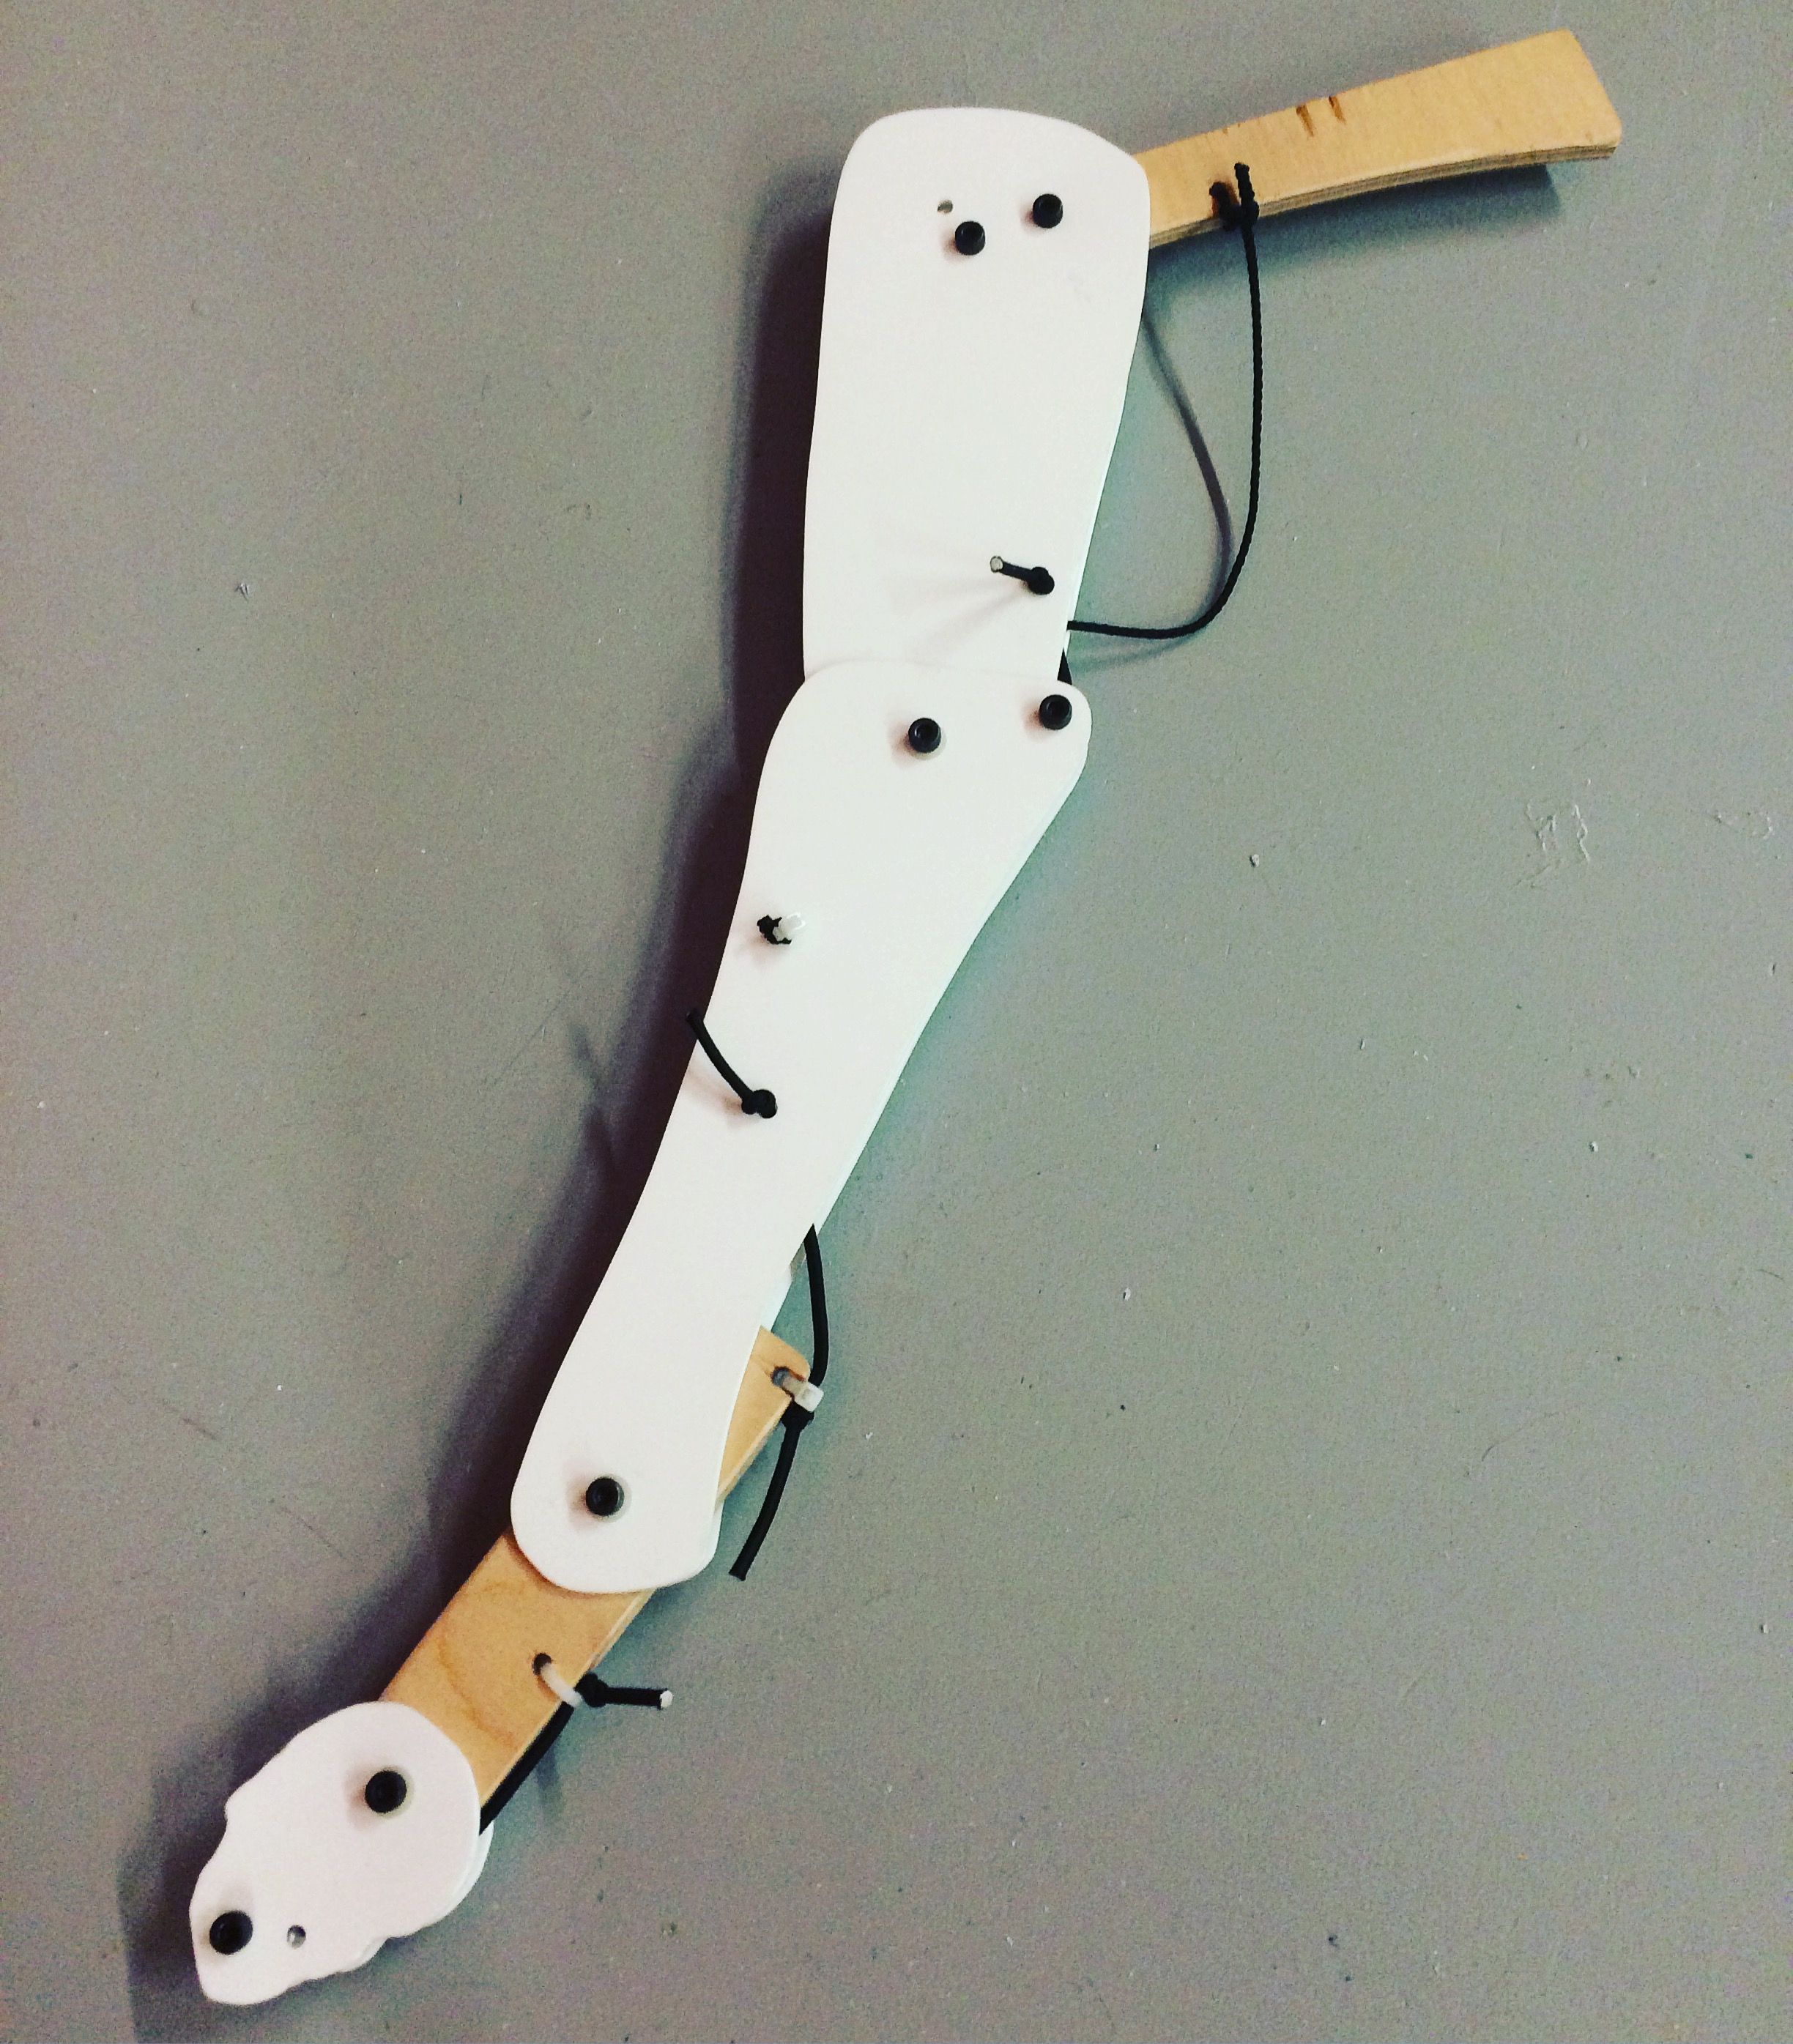
I won’t go into detail here about how we made the legs as I’ll probably end up confusing everyone, not to mention myself! Check out Jimmy’s Instagram page for a bunch of puppet-making clips.

So that’s another brilliant workshop with these guys. Their passion, talent and generosity really are a rare and wonderful thing.

Print-making at Open Studios Cornwall

I recently left the hubbub and noise and chaos of London for a slice of peace down by the sea in Cornwall. Though I’ll still travel all over for acting and puppetry work, this is the place I will be calling home for the foreseeable future.

Ink print of a large leaf on paperAs luck would have it, during my first few weeks in Cornwall I had the opportunity to take a peek in some local artists’ studios and take part in a print-making workshop as part of Open Studios Cornwall. Driving down perilously narrow, windy country lanes after all that city driving ripped my nerves to shreds, but it was worth it for the glimpse of different artists’ creative lives. Chatting to each artist about their work was a real privilege, discovering personal stories reflected in how each person responds to the world around them through their creations.

Several of the artists taking part in this year’s Open Studios Cornwall also offered workshops (for a fee), covering everything from bookbinding to creative writing, stained glass to ceramics, Chinese calligraphy to botanical illustration. I wanted to take part in at least ten, but with a limited budget from the cost of moving house I had to pick just one, so I went for Mono Printing Using Natural Objects with artist Pam Furby.

Ink print of several smaller leaves on paper

The workshop provided a wonderful two hours to immerse ourselves in being creative and forget about the rest of the world. We started by wandering round Pam’s beautiful garden choosing natural objects we wanted to work with, then headed up to her little studio to have a go at printing with our finds. I mostly gathered leaves of various shapes and sizes, as I wanted to explore how their intricate veiny patterns would come out in the ink. The prints were just as beautiful and interesting as I had hoped, and a small feather also made for a lovely print.

The table in the artist's studio covered in piles of leaves, inks, papers and plastic boards.

I began by rolling out a small amount of ink on to a plastic board with a little roller, then pressed the leaf down into the ink, veiny side down (so that the side with the most interesting pattern or texture was face-down). I then peeled the leaf off and placed it on to the piece of paper I wanted to print on to, placed another piece on top, creating a leaf sandwich, then pressed down firmly so that the leaf left an inky print. Pam also had an ink press that we could use to give a more even pressure than our hands could.

A brown and black ink print of a small leaf on paper.Having never worked with ink in this way before it was very much trial and error for most of us, just having a go and having fun. As we became more confident using the ink and developed a sense of what patterns and effects we liked, some of us experimented with different colours, mixtures of colours, and different arrangements of our objects on the page. I found that often the second print using the ink-covered leaf would make a clearer picture than the first, which contained too much ink – less was more! When initially pressing the object into the ink we used a piece of newspaper so our fingers didn’t become covered in ink, and the ‘negatives’ this produced on the newspaper were often interesting pictures in their own right.

I love the prints I created during the workshop and one or two might even make it up on the wall! The next step is to experiment with different amounts of ink and pressure until I can capture as much of the delicate veins of the leaf as possible. Then I can move on to the next object, whatever that may be!

Teaching my first puppetry workshop… in Russia!

At the English summer camp in Russia with CLASS Study and Training Centre this year we wanted to teach the students some specific theatre skills that they could use in their final devised pieces. Along with a bunch of fun drama games for team-building, firing up imaginations and encouraging creativity, I led my first puppetry workshops with the students.

IMG_8661

The first part of the workshop involved making simple bunraku-style puppets using a method I learnt at a Little Angel Theatre inset workshop – you make simple string ‘skeletons’ (sort of stick men), then the students wrap newspaper around these and fix it in place using masking tape. In the second part of the workshop I went through a puppetry warm-up, then showed the students how to animate their newly-made puppets. We covered the main principles of puppetry, including breath, weight and focus, and I encouraged them to explore different rhythms with their puppet’s movement. In groups of mostly four – three people on the puppet and one directing, though making sure to rotate roles – they then created short sketches to perform.

I wasn’t sure how the students would respond to working with puppets, but both groups really engaged with it, and with the younger group particularly I saw students who were normally a bit disruptive suddenly become engrossed in the activity. It was fantastic to see their enthusiasm and how much they were enjoying themselves.

The short sketches they devised ranged in subject matter from a day in the life of camp to a doll coming to life when its owner’s parents had left the room, to a marriage proposal between two puppets! Kids of all ages can be so creative if just given the space to do so.

These simple puppets were a great idea to make with the students – it felt good to put into practice something I’d learnt in the workshops at Little Angel Theatre. I’m now thinking about how I could improve on the session, and how I can progress on to making slightly more complex puppets the next time I deliver a workshop. With more time, I had wanted to try some object manipulation, with the students each bringing an object of their choice to the session to animate. Maybe that’s one for next time!


Making a moving mouth puppet

img_7825

Over our last two puppetry classes at Little Angel Theatre we have been making simple moving mouth puppets. Using electric breadknives to sculpt foam blocks into heads and hot glue guns to stick on eyes, nose and the opening mouth, we created a variety of funny-looking characters.

First came the drawing part. Drawing lots of circles for heads we tried out all different shapes and sizes of nose, and different placement of the eyes and the mouth, drawing first the front view and then profile. You can see in the second pic some of the different combinations I came up with. Next we drew the chosen face onto one side of a foam cube and the profile view onto another side, then used an electric breadknife (I genuinely hadn’t been aware such a thing existed) to sculpt the block into a sort of sphere. (It was a bit more technical than this but the best thing to do is have someone demonstrate it like our teacher Oli Smart did.)

img_7812

To get rid of any sharp edges we picked away at the foam with our fingers, then smoothed this by snipping away with a pair of scissors. I, however, quite liked the pockmarked effect so decided to keep it. I didn’t manage to get it entirely spherical, but then, whose head is a perfect sphere? We’d probably look pretty funny if it was.

Sculpting a nose from foam – the bigger the better with this kind of puppet – we stuck this on with the hot glue gun (my first time using an electric breadknife AND my first time using a hot glue gun! Playing with the big toys now). The mouth was a bit more complicated – again, it’s best to watch someone do it. We cut along the line we’d drawn for the mouth until we’d basically cut off the head/face below this point, then cut it down at the point where we wanted the mouth to open from. The bottom jaw was then stuck back onto the head by sticking a folded piece of card to both bits with hot glue. No, I’m really not explaining this very well!

img_7813

For the eyes we dug out sockets then glued polystyrene balls into the sockets and drew pupils on with a marker pen. Many of us finished off our puppets with some fuzzy eyebrows. There were some fantastic bushy black and brown ones, but I opted for making a pair of rather groomed-looking ginger brows. I didn’t get round to making any hair before the class finished, and if we had more time we would cover the foam with felt, but I’m pretty chuffed with him (I think it’s a him) as the first puppet I’ve ever made! At tonight’s class Ronnie Le Drew will be showing us how to make our puppets speak, so hopefully once I find the puppet’s voice I’ll discover more about the character of this little chap.

Christmas present fabric pictures

I do love a home-made gift, as does everyone in my family. This Christmas I got out my needle and thread and made little fabric pictures for my mum and Grandma.

The wooden box frames come from Wilko and the fabric is from my sister’s bags of fabric scraps (she does a lot of crafting). All I needed other than that was a needle and thread, card, a pencil, some fabric scissors and embroidery scissors.

IMG_4247

I started by disassembling the photo frames, taking out the back piece and drawing round it on a piece of white card. This is to stick the fabric to in order to keep it from slipping down. I then cut a piece of calico the same size for the background of the picture.

Rifling through the fabric scraps I found a few bits I liked the look of and decided to keep it simple with a tree, some grass and three birds (see pictures – sorry about the poor quality shots). I used backstitch to keep the pieces of my picture in place, then stuck the whole thing to the card with that old Blue Peter favourite, double-sided tape. And hey presto!

The tree and birds picture is for my mum, and I made another box frame fabric picture featuring butterflies and flowers for my Grandma. You can of course use normal frames but I like how the box ones add depth to the picture and don’t flatten the fabric or stitching, as the glass isn’t sitting directly against the picture. Wilko also sell larger box frames if you’ve got more time and fancy creating something a little grander.

IMG_4272


Wilderness FarmFest with InterAct Wales

In a house by a river in Wales something is happening. People are gathering round a campfire sharing poems and songs, making minions out of clay, creating shadow puppets and mosaics, and wading through the river with sticks. These people are InterAct Wales and their guests at this year’s Wilderness FarmFest.

The festival is still in its infancy but hopes over the next few years to welcome more and more creative folk to this remote part of North Wales, to spend a blissful weekend creating, making, sharing and having fun. I headed up there last Friday with my boyfriend Alex, invited by my friend Helena, company member of InterAct Wales and fellow actor who trained with me at East 15.

IMG_4059

After an evening spent drinking wine outside in the hot tub under the stars, Saturday morning kicked off with a clay modeling workshop. I love clay. I really love clay. I also love the Minions, so when Helena’s brother Kieran showed us how to make Minions out of clay I was in creative heaven. I was also surprised to find out that the key is to make your basic shape out of tinfoil first, then layer the clay on top of this. Who would have known! (Well, any art teacher I suppose, but they didn’t teach that at my school!)

The second workshop of the day was led by Helena’s mother, Viv (yes, it is a family business). InterAct Wales has recently been doing work in schools, teaching the children to make little mosaics, so we were treated to tubs full of colourful tiles to choose from and let loose with the PVA glue. Viv taught us how to safely use the tile cutters (wear goggles at all times!), so we could cut tiles down to size to fit in those pesky gaps. The next morning we grouted the mosaics then stood back to admire our creations. Not one mosaic was the same. It was fascinating to see all the different ideas and techniques – how there could be so much creativity in one room of people. A web developer who spends his day sat in front of a computer, Alex would normally never have the opportunity or even the inclination to make something like this, but he seemed to thoroughly enjoy it, and his sun/flower mosaic was beautiful.

The creative fingers were given a break after lunch when Helena’s dad, Bill, took us for a river walk. I’m not a huge fan of rivers – not since I got stuck in one on a school adventure day aged 12 and had to be rescued – so the thought of wading through one didn’t exactly fill me with glee. However, I gave it a go and I’m so glad I did. Armed with sticks to test the depth and a pair of borrowed wellies, we made our way down the river in single file, Bill leading the way. He pointed out otter prints, guided us around deeper water, and got us safe and sound, if a bit soggy, back to base. It was a brilliant experience.

12022561_10153215244751247_4962072958197209323_o

In our final workshop, on Sunday morning, we made shadow pictures and animations with Amie Taylor, actor and all-round creative. The pictures were beautiful, and it was great fun watching our short animations. It’s definitely inspired me to try and make a longer one. Interestingly, the first person to finish their picture and animation was the only child in the group. Where we all took a while thinking up some fantastic idea then wanted to get it perfect, she just went for it, and ended up making the longest and most interesting animation of all of them! I think we can learn a lot from children about taking creative risks.

My favourite part of the whole weekend (obviously apart from the clay) was Saturday evening. Near the house was a bridge across the river, and over this, a little area down some steps where Helena and her family had strung up fairy lights, lit a fire and laid out some mattresses to sit on. After a BBQ for dinner we filled our glasses, huddled together, and shared poems, stories we had written, songs, monologues and music. There was a flat area we used as a stage, which I stepped onto clutching a short story I wrote a while ago called The Penny, and a little book of poems my sister made for me. I read a poem she’d written called Familiar Stranger, which I felt fitting for the occasion. It was a very special evening, and inspiring to witness other people’s talent and creativity.

We were sad to leave Wales on Sunday, but after such a wonderful weekend I now have new friends, new creative connections, and am feeling inspired to make and do more. I can’t wait to come back here again next year…

Cross stitch bluetit bookmark

Feeling on a bit of a roll with my homemade stitched gifts, I recently attempted another cross-stitched bookmark, this time for my mum’s birthday.

I say homemade, but as with the puffin bookmark I made for my sister’s birthday, there was a certain manufactured element to it – I bought the pattern for it from Samuel Taylors at Embsay Mills, near Skipton. Yes, I did have a bit of a field day in there! I also bought a lighthouse bookmark pattern, which I will be making for myself very soon, so watch this space.

Bluetit bookmark

This pattern was a bit more advanced than the puffin one, and took me a great deal longer. The most challenging bit wasn’t the cross stitch, it was the backstitch details you sew after you’ve done all the cross stitch, and, of course, the infamous French knot. The instructions tell you to leave the knots until last, and with good reason, or you may well throw down your sewing in exasperation and give up the whole lot!

Before attempting the dreaded stitch I looked at various ‘how-to’ pages online. I had heard through word-of-mouth of the difficulty of the French knot, but was determined that I was going to buck the trend and get it right first time. Ohhh the ignorance of youth! (28’s still young, right?!)

Bluetit closeup

Well, I read through the instructions various times – the best were at sublimestitching.com – and gave it a go. After the third unsuccessful attempt I was a little disheartened as getting it right first time was clearly out of the question. After the tenth attempt I let out a howl of exasperation and decided to just tie little knots in the thread and try to push them down to the spot against the aida where I wanted them. You can see in the close-up pic how they turned out – not ideal, and probably not as neat as a French knot, but they sufficed. Sometimes a bit of improvisation is called for!

As with the puffin bookmark, once I’d completed the pattern I folded over the two ends of the aida strip, turning in the corners, and ironed them flat against the back of the stitching. I teased open the hole in the middle of the stitched circle at the bottom of the bookmark until it was large enough to fit the tassel cord through, then tied this in place. I then cut a strip of paper – using tissue paper this time – to slot in-between the aida and backing felt and put it in place before sewing the light blue felt strip to the back of the bookmark. Last time I used blanket stitch, but this time I decided to just use small backstitch, and it ended up much neater.

Mum was thrilled with the present, and I was pretty chuffed with the result too!

For more handmade gift ideas, check out my little sister Amie’s blog littlebluewrenblog.wordpress.com. Amie’s been crafting away for years and has given me material for some of my posts but has only recently set up her own blog, so please do have a read and comment on her creative projects, which so far include a bag for mum’s sewing stuff, a dressmaking course, and a spot of butterfly shadow quilting! 

Backstitch motorbike

You only turn 30 once, so to mark the occasion of my fella’s thirtieth birthday I wanted to get him something special, and what’s more special than a personal hand-made gift?

Framed backstitch motorbike

He’s a big fan of motorbikes and owns a Yamaha FZ6 Fazer S2. As I’m cracking on with the cross stitch, I thought I’d try to create a motorbike pattern, so I used one of those online tools which makes a cross stitch pattern from a photo you upload. However, as his bike is black and the photo itself was pretty dark, I ended up with about ten different shades of black and not much definition beyond a motorbike-shaped blob.

Motorbike sketch

As all that detail on the bike seemed just too complex to sew, I decided to give backstitch a go, and just focus on the outline. This of course developed into an outline of every part of the bike, and after much faffing about leaving just over a week until his birthday, I feared I may have bitten off more than I could chew!

I’d picked up some beige fabric from Samuel Taylors at Embsay Mills the last time I was up north with a similar project in mind, so I used this for the background. After printing off a photo I found on the internet of the right model of bike, I sketched the bike freehand onto the fabric, before securing it in an embroidery hoop to keep it taught while I stitched.

I decided to just use black and one shade of grey for the bike to keep it simple, plus yellow for the lights (I didn’t have orange). As I stitched along my faintly sketched lines I kept referring back to the photo as well. With only the final bit left to do – the engine – I have to confess I made up a few bits! My boyfriend’s bike is only half faired, which means the engine is exposed, making a more interesting but difficult task of backstitching, hence the making up a few bits!

Motorbike sketch 2

My nemesis throughout the whole thing was the tyres – as I discovered, I need a bit of practice at sewing in a circle! The resulting effect of the bike looking like it has two flat tyres is not really what I was going for, but at least I know what to work on for next time.

Once I’d finishing stitching I took the fabric out of the embroidery hoop and discovered to my horror that no amount of ironing would completely get rid of the oval mark from the hoop. My mum suggested wetting the fabric a little next time, perhaps just using the spray function on the iron.

I then put the piece in a black frame I’d picked up from Wilkinson’s for about six quid. The fabric needed cutting down a little to fit in the frame, before I glued it to the back of the white card surround placed within the frame. Et voila! One personal, home-made thirtieth birthday pressie!

Puffin bookmark

Now I’ve re-acquainted myself with cross-stitch, for my sister’s birthday present I decided to move on from stitching owls to sewing a puffin.

Amie's puffin bookmark

I bought a pattern for a bookmark from Samuel Taylors at Embsay Mills, which included all the threads, needle, 14-point aida, felt backing and a tassle. The first thing I did once I’d excitedly torn open the packaging and was gazing perplexed at the tangle of threads in front of me, was to use a hole punch to make a row of little holes along the bottom of the paper containing the pattern. I then separated the threads into different colours and threaded each colour through a hole then tied it in place.

Threads for puffin bookmark

Thankfully this pattern has a simple border, so I made a start on this, sewing a line of half cross-stitches, then sewed back along the line in the other diagonal direction to complete the cross-stitches. I always used to sew each full cross-stitch before going on to the next, which often resulted in a long line of stitches looking higgledy-piggeldy, so this technique of doing a row of half-stitches first before going back over was brilliant. I’m sure this is the way all cross-stitch aficionados do it anyway, but as a relative newbie it was a revelation for me!

Row of half cross-stitch

I have a habit of jabbing needles into my fingers when sewing, and have drawn blood several times, so the slightly blunt needle provided in the pack was a blessing. The aida seems to be of a high quality and was soft and lovely to sew on.

I worked diligently on the bookmark for several weeks and forgot how long cross-stitch takes, especially if you’re not yet particularly good at it and have to keep going back and unpicking tangles! I got there in the end, and after a good fifteen minutes of frustration spent trying to force open one of the aida holes to fit the tassle through, I finally managed it. All that remained now was to blanket-stitch the felt strip to the back of the aida, after folding down the top and bottom inch. Sadly I can’t say my blanket stitching has improved much since my first go with the Pride and Prejudice bookmark, but hopefully my sister Amie will spend more time looking at my handiwork on the front than the back!